• hello!!
  • home movies
  • diy
  • wellness
  • shop
    • obsessions
    • β€ŽLIKEtoKNOW.it
  • contact
    • Bloglovin
    • Instagram
    • Pinterest
    • Twitter

life of charmings

love, family, happiness

April 19, 2012 in crafting· diy

makey thursdays! chan luu-esque wrap bracelet

whiiiile we’re in italy, i have a little makey thursday to share… a couple of wrap bracelets that i’ve been wearing like crazy and did not spend $100 on! perf!

okay, when i first saw the price tag on chan luu bracelets, i was a little confused… because i’m pretty sure they’re like $100 and $200 for an upscale version of bracelets that kids have been making at summer camp for years. but then i met a hand full of chan luu bracelets in person one day at this awesome store that had some for way way cheap. i fell in love with a little single wrap channy and got it for $10! it was marked down to $20 and i had one of those $10 for $20 vouchers, so it totally felt like winning the lottery. and after that i started browsing the nets for all those cute chan wrappies and couldn’t take my eyeballs off of this one. and then my other fav, this one! but pay for them, i would never. what i would do, though, is stare at them until my eyeballs turned into prunes to see if i could chan it up myself. and by that, i mean make one! or two!

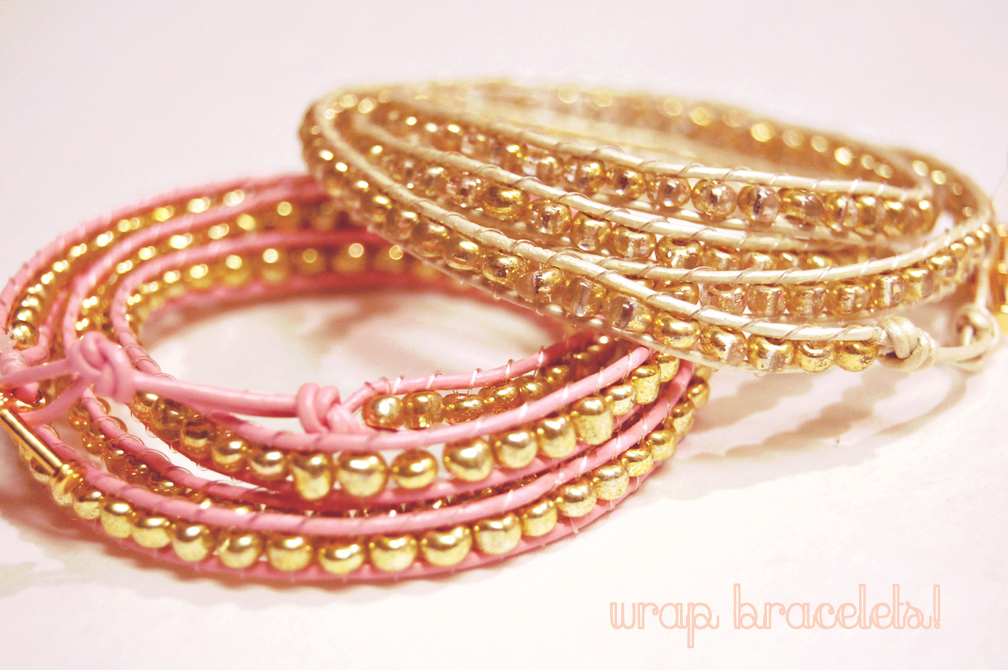
and i could! and i did! and so can everyone!

this is how:

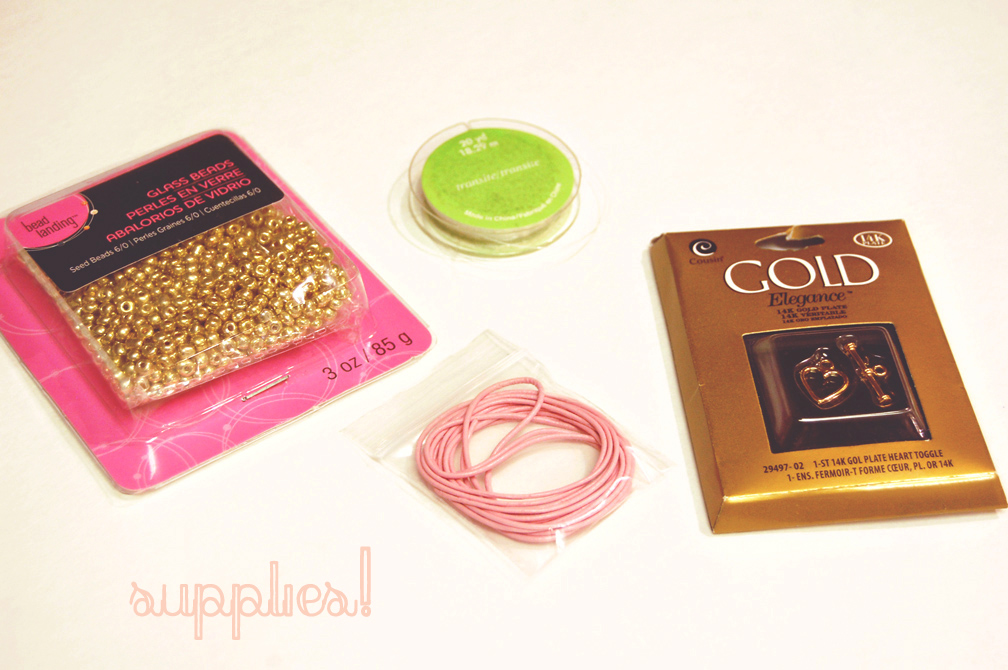
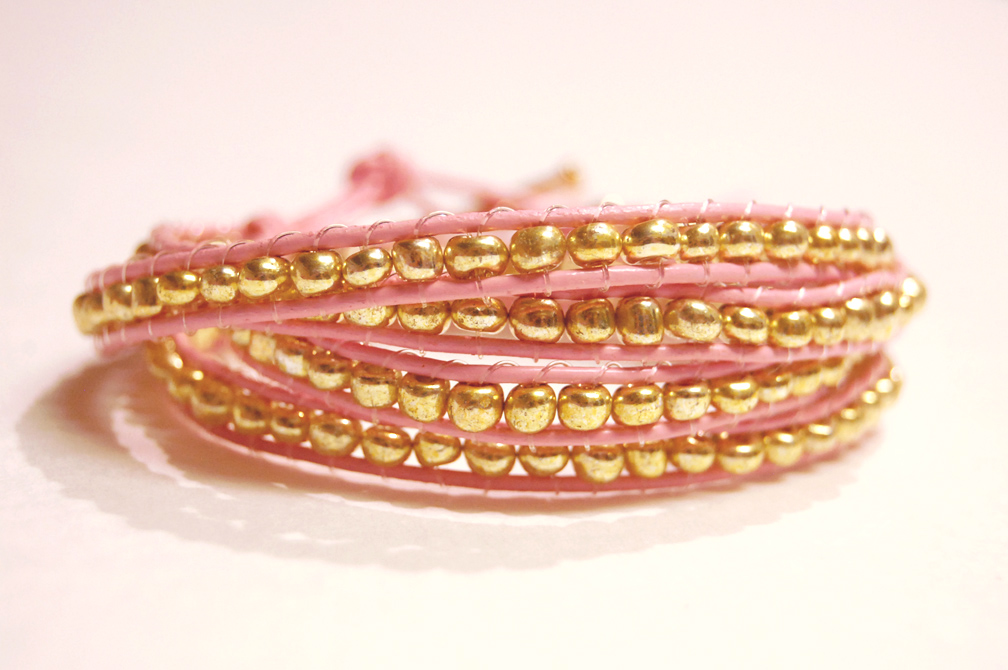
you need: little beads – mine are glass,
clear beading wire – not the stretchy kind,
leather cord, end toggle

*everything i used is from michaels, except for the pink cord, which i ordered off of amazon.
*how much leather cord you need depends on how many times you want your bracelet to wrap. 6 feet was enough for me for a quadruple wrap.
*real chan bracelets have a little gold vermeil button on the fastening end, but i just used the straight part of a gold toggle. apparently this world just isn’t too full of gold buttons.

1. fold your leather cord in half and slide the end toggle on and to the middle, so the two ends of the cord hang evenly on either side of the toggle.

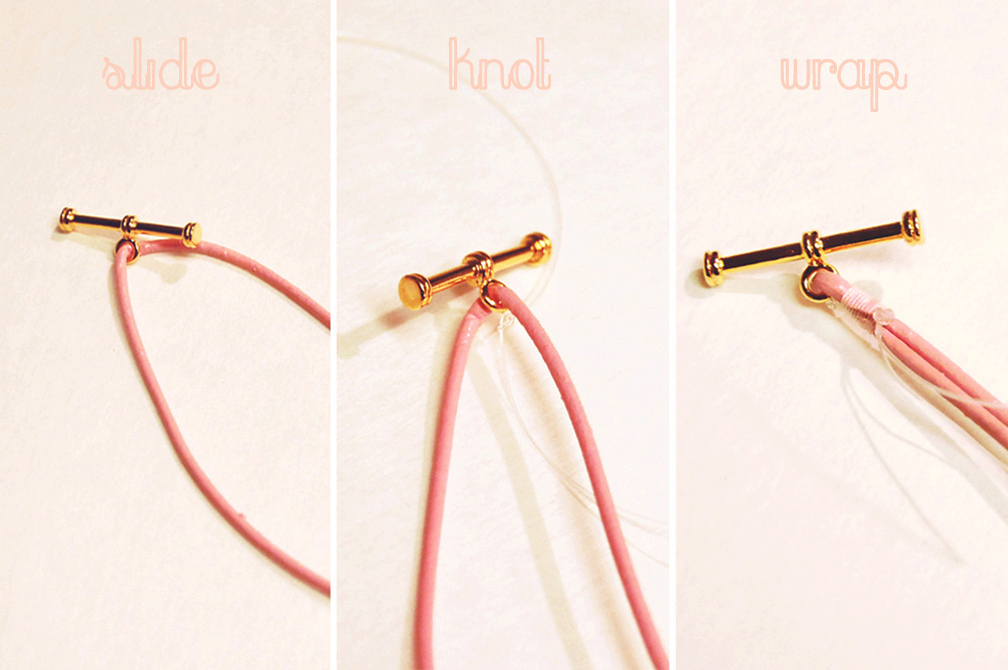
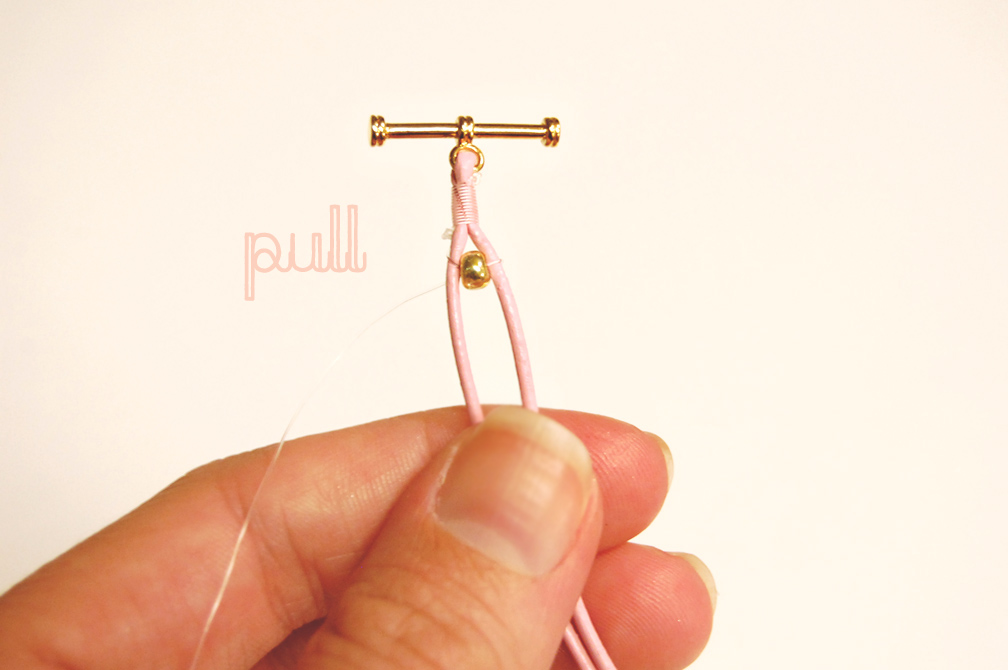
2. cut off a ton of clear beading wire. i would say make it maybe at least 3.5 x’s the length of the bracelet. [not length of the leather cord in total, but the length of the cord after it’s folded in half, since that’s how it will wrap around your arm.] that sounds crazy. i know. and it’s a lot to deal with at first but you use it up quickly and you don’t want to run out! i used 2.5 x’s the length of mine at first and it wasn’t quite enough. anyway, slip one end of the clear wire through the little toggle hole and tie it on [i double-knotted], leaving about 2.5 inches of excess clear on the short end of the wire after it’s tied on.

3. let that short end of the clear hang down with the leather cord and wrap the long end of the clear around and around really tightly beneath the toggle, going around the cord and short bit of clear to make everything nice and secure. i might’ve wrapped 14 or 15 times. then tie off the short end to the long end with a double knot. i don’t know words for different knots, but then i did a third and final knot on top of the double knot, which was a little tricky. then i dotted the knot with super glue before trimming the tiny excess off. knots feel so ugly, but you won’t notice it when your bracelet is done!

4. then! you want to clip your new bracelet end to something that can act as a clipboard to start beading. if you’re like me, you might find that your ipad comes in handy! the next part is kind of confusing, but when you get the hang of it it’s kind of fun and mindless like braiding or knitting or weaving. not that i weave, ever.

5. hold the clear wire in your left hand so that it’s coming from the under side of the left cord. slide a bead on and bring the clear over top of the left cord.

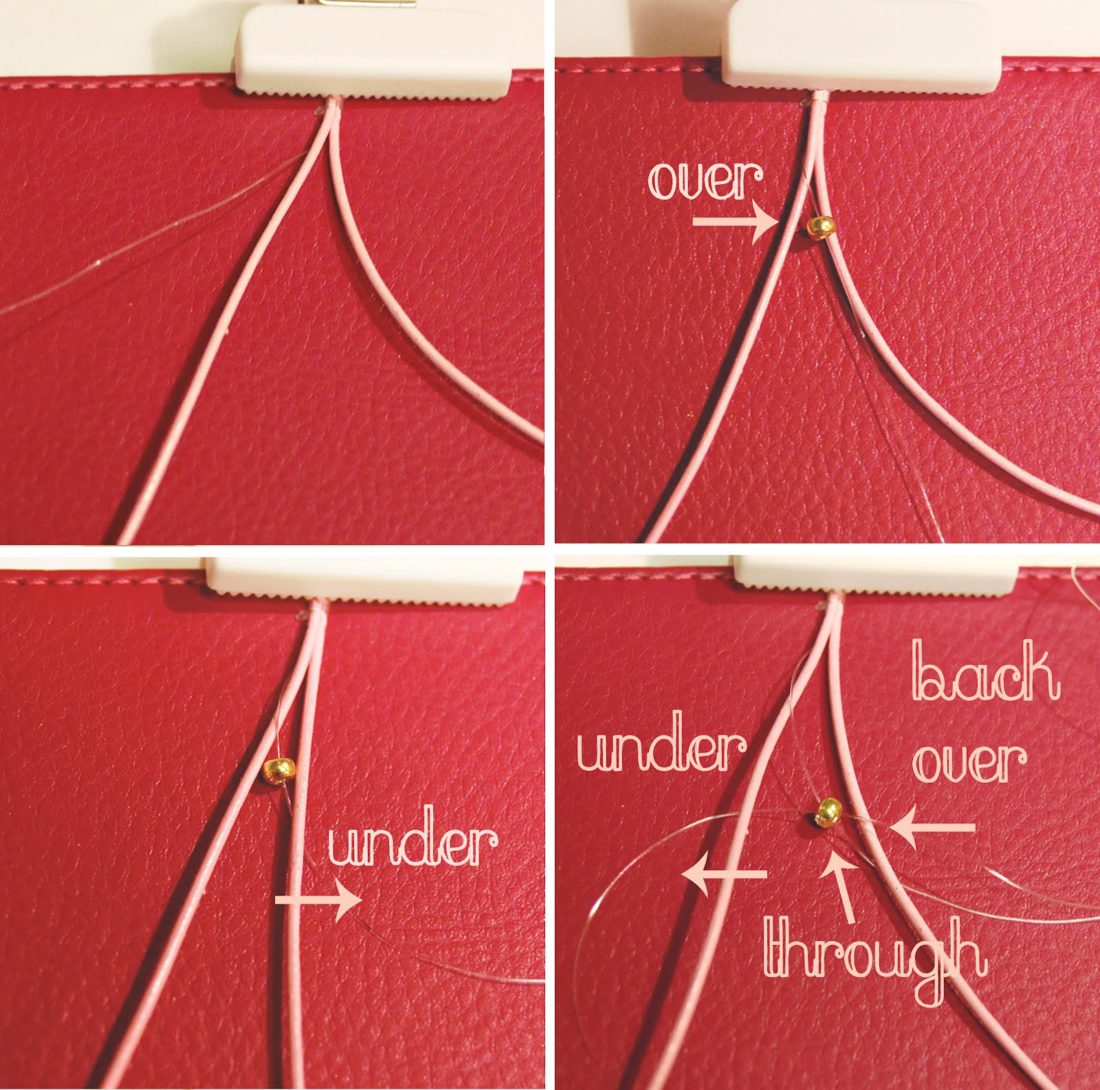
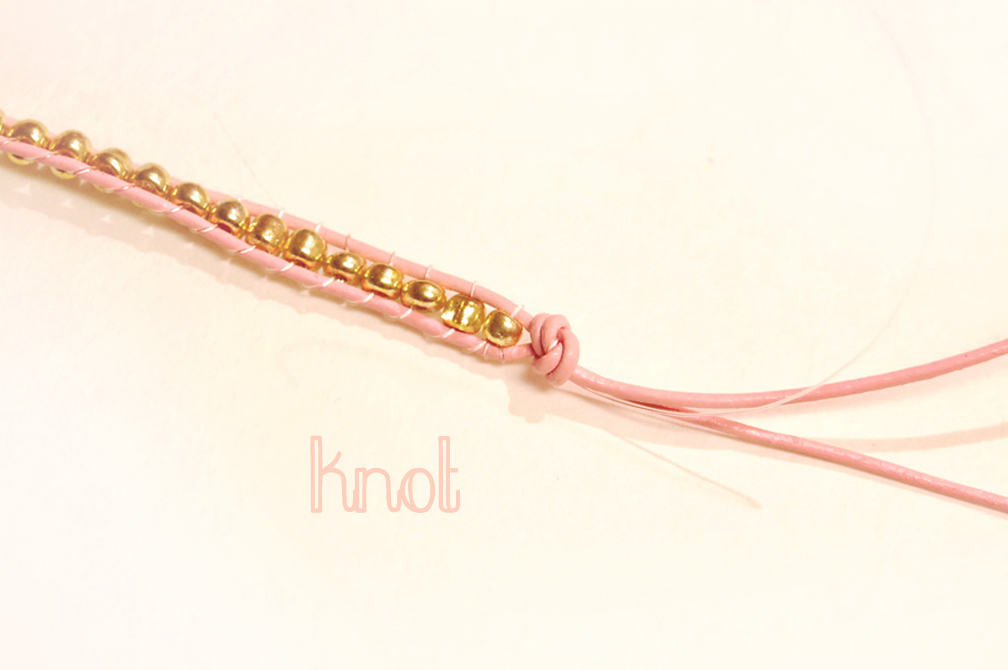
6. hold the bead in between the two cords while you bring the clear underneath the right cord.

7. now, bring the clear cord back over top of the right cord going in the opposite direction, slide it back through the bead, and pull it underneath the left cord. kind of like an infinity sign -> ∞

8. pull it pretty tightly! but not too tight. just so it’s snug.

9. yay! now repeat! for a long, long time. it somehow starts to go pretty quickly, though. you just have to be careful not to let your clear wire get knotty and tangled.

10. to finish, [and you still want to have maybe 6 inches of leather cord remaining for the end], tie off the clear with a double knot onto the left cord and then knot the entire thing together beneath the final bead.

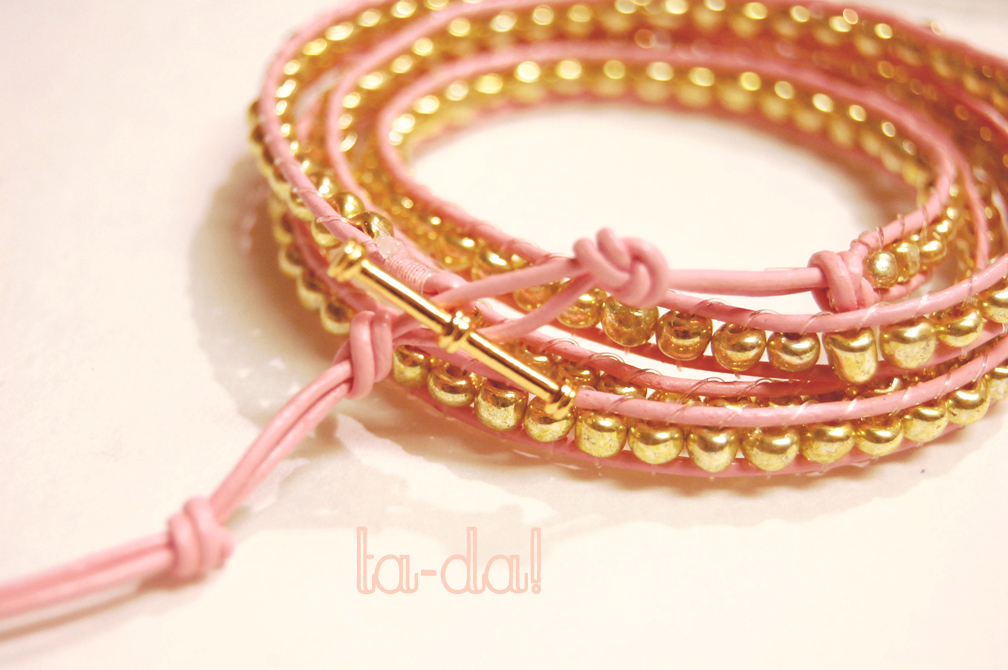
11. it’s probably good to dab some super glue around in where your clear cord is and then snip the excess clear.

12. this is such a chan luuey part of the bracelet: tie a few more knots in the finishing end with about 1/2ish inch sections [or however big you need them to be] between for your toggle to fasten through.

13. success!

a happy wrappy! so, i’m sorry, chan, for not spending outrageous dough on your goods, but i’m pretty sure you won’t notice. i will say, though, that i’d love to find some really nice gold beads to do this with, since i’m not too sure how long the gold glass beads will keep their gold. but anyway. a pretty bracelet for not $245! woo!

  • Click to share on Facebook (Opens in new window) Facebook
  • Click to share on X (Opens in new window) X
  • Click to share on Pinterest (Opens in new window) Pinterest
  • Click to email a link to a friend (Opens in new window) Email

Related

« 24 weeks of bambina… in italy!
we’re baaaack! »

Comments

  1. A "cheery" disposition says

    April 19, 2012 at 2:06 pm

    wow this is awesome!. I have to Pin it… I hope your ok with that πŸ™‚

    Reply
  2. Kelsey says

    April 19, 2012 at 2:54 pm

    Yay! Thank you so much for posting this I can't wait to make these!

    Reply
  3. Jaime @ La vie...J'aime says

    April 19, 2012 at 4:10 pm

    this is awesome! have to try if i get the patience one day…lol. hope you are enjoying italy!

    Reply
  4. Molly Bonner says

    April 19, 2012 at 4:16 pm

    you're so freakingggggggg cool and artsy and creative and talented. can't believe i get to be your bride. quite an honor.

    Reply
  5. Emily says

    April 19, 2012 at 8:51 pm

    OH my gosh! Thank you for sharing! So so cute and I will deifinitly be making when I have time!

    Reply
  6. Tereza says

    April 24, 2012 at 7:21 pm

    what a great DIY thanks so much for sharing πŸ™‚

    Reply
  7. Michelle's Style File says

    May 16, 2012 at 7:54 am

    Beautiful DIY! Love this.

    x
    Michelle
    http://www.michellesstylefile.blogspot.com

    Reply
  8. Suzie Q says

    May 16, 2012 at 3:49 pm

    This is amazing! If I ever have time, this is the perfect DIY project =) Thanks for sharing this. I've been loving the Chan Luu bracelets too. Your blog is so great =)

    xoxo,
    Suzie Q
    http://www.StyleCueBySuzieQ.com

    Reply
  9. Anonymous says

    June 7, 2012 at 12:49 am

    Thanks so much for this! I just made one of these and you made it so clear and easy to follow! πŸ™‚

    Reply
  10. Sammyegail says

    October 7, 2012 at 5:19 am

    Love your toggle as a clasp! I used both parts once and it looks a bit odd. Thanks for sharing that idea!

    Reply
  11. Mrs. Williams {Persnickety Plates} says

    November 12, 2012 at 5:13 pm

    Great tutorial! I had another one pinned that I tried and got lost a couple steps in. I'm going to give yours a shot πŸ™‚

    Reply
  12. Irit M says

    April 23, 2014 at 11:04 am

    Oh. so lovely!! like your ideas, but wanted to ask you 2 questions:
    1. The beads are seed beads No. 6, right? and about the leather cord, how long is it, because I have to buy and don't know how long? And what is the thickness of this leather cord? and the clear beading wire, if you know also the thickness of it? Thanks for advance!!

    Reply
  13. em says

    April 26, 2014 at 5:37 pm

    Thanks for the great idea!

    Reply
  14. Katie says

    April 27, 2014 at 11:37 am

    I love how simply and well illustrated you were in explaining how to do a simple wrap bracelet or what seems very simple for the creative people of this world! πŸ™‚
    I am in awe of your clever ability for using your iPad and a clip vs. a clipboard or the $80 Knotty Do It All! Thanks for sharing your knowledge and passing it along to so many others!
    Katie

    Reply

Leave a Reply Cancel reply

Your email address will not be published. Required fields are marked *

peep into the past

peruse some favs

obsessed! spring to summer favs… so nice i’d buy it twice ;)
where do babies come from? [a tale of bunny magic]
packing tip! do you have a bunch of these stashed away, too?!
obsessed! favorite game changers…
20 minute banana oat bites!
obsessed: favorites for pregnancy, third time around!
going in my hospital bag: essential oils for birth!
obsessed: all time favorite amazon purchases!

can’t live without

in him our hearts rejoice, for we trust his holy name. psalm 33:21

Copyright © 2025 · Market theme by Restored 316